Saturday, February 26, 2011

Bannack: Portraits


1. Barn; 2/22/2011 11:45 am; 1/1250; f/3.2; Flash did not fire; Canon PowerShot A520
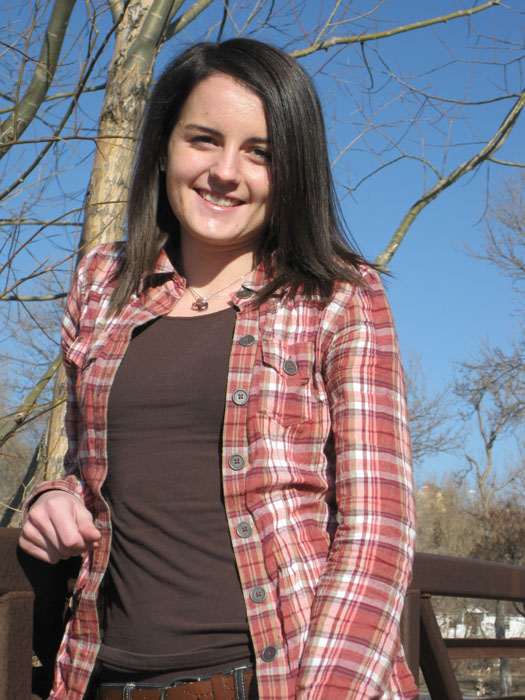
2. Portrait; 2/22/2011 1:30 am; 1/160; f/4; Flash did not fire; Canon PowerShot A520

I had a lot of fun taking portraits. I had a hard time finding the right light but with some experimentation, I had a couple pretty good shots.  For the photo taken outside of the barn I did some edits on clarity and vibrance in camera raw. For the second portrait shot I also did some minor edits and added a burned border for a more professional look. I could use a lot more practice in the seating/posing of models in portrait shots.

Monday, February 21, 2011


1. Spin; 2/20/2011 7:32 am; f/2.6; 8.0; Flash did not fire; Canon PowerShot A520
2. Colored Stars; 2/18/2011 11:41 pm; f/2.6; 6.0; Flash did not fire; Canon PowerShot A520
3. Jana's Lights; 2/18/2011 12:30 am; f/8; 6.0; Flash did not fire; Canon PowerShot A520
4. Courthouse; 2/18/2011 11:28 pm; f/8; 8.0; Flash did not fire; Canon PowerShot A520


Light Painting: I spent hours just painting on the wall. I didn't really end up with the shot I was looking for but it was fun none-the-less. I bought some glow sticks from the dollar stoe and doodled on the wall. I adjusted the shutter speeds anywhere from 6 to 8 seconds. In this shot I took the two glow sticks and spun them in a circular motion. Later I opened it in bridge and did some basic edits to the saturation and brightness.

Camera Motion: Some houses still have Christmas lights up even though it is almost March! Setting my camera to shutter priority mode I set the shutter speed to 7 seconds and panned my camera all around the light. My roommates also have colored Christmas lights up in their room. I repeated the same process. I opened both of these photos in bridge and did some minor edits.

Moving Light: I borrowed my roommate's tripod that her great-great grandfather bought in the 40s. It is super cool! I set up on the intersection corner by the Courthouse. I set the camera to shutter priority with a shutter speed of about 8 seconds. I took several shots, this one was my favorite because of the composure of the shot. I like having the Courthouse and the flag in the background.

Saturday, February 19, 2011

Fine Art Templates


1. 
1. Day in Spain; 4/6/2010; 3:40 pm; f/2.6; 8.0; 1/500; Flash did not fire; Canon PowerShot A 520
2. Roundabout; 2/12/2011; 5:07 pm; f/2.8; 1/500; Flash did not fire; Canon Powershot A 520

For my first template I used a photo I took of a cathedral in Segovia, Spain. I created the template using the instructions in the book.  After changing the color of the background I decided I wanted to put a light border around each of the five boxen (ha ha) I used the select tool and selected on of the boxes. then on the layers pallet I clicked on the fx button, stroke. From there I could change the size and opacity of the border.

In the second fine template I used a photo I took on a roundabout in Utah. I liked the color. Rexburg is so with right now! I applied the same techniques with the borders around each box. I did create a stamp with my signature, but it didn't fit well with the overall composition so I left it out.

Monday, February 14, 2011

Edge and Border Effects


1. Stalks; 2/12/2011 5:06 pm; f/4.0; 1/250; Flash did not fire; Canon PowerShot A520
2. Wheel; 1/28/2011 4:15 pm; f/8; 1/25; Flash did not fire; Canon PowerShot A520
3. Elder Sharp; 2/3/2011 3:33 pm; f/2.8; 1/60; Flash fired (auto); Canon PowerShot SD790 IS

Learning edge and boarder effects was really fun. For Stalks I followed tutorial #12. I thought that this edging added a nice touch to the overall composition of this photo. I selected the border color from one of the stalks in the picture by using the eyedropper tool.

For Wheel I followed tutorial #13, Burned Border. I like how simple the application of this border is. It also adds a nice finishing touch.

In the photo Elder Sharp I followed tutorial #11 and then added some of the steps from tutorial #12. First I edited away blemishes and some darkness under the eyes. I didn't really like how the brushed-on effect turned out with the photo I selected so, I used shape layers again with the fill pixels option to frame the picture. It has potential.

Scanography


While at work I decided to take advantage of the scanner right by my desk. I used stuff I had around, like my headphones and some cds. I thought the scans needed a little texture so I scanned the sweater I wore that day. To scan these objects I left the scanner open and turned off all the lights in the room. Overall, that gave me a very dark background.  I took all these scans into Photoshop and blended them all together. It turned out pretty well! I lightened the opacity of the CD picture so that the sweater and headphones could show through. I then added a new purple fill layer and adjusted the brightness levels a bit.

1. Headphones; 2/11/2011 11:10 am; Epson Perfection V500 Photo
2. CDs; 2/11/2011 11:23 am; Espson Perfection V500 Photo
3. Sweater; 2/11/2011 11:46 am; Epson Perfection V500 Photo
4. Music-Blended and Edited in Photoshop


For the One Scan I played around with noodles. I used lasagna, linguine and manicotti noodles but in the end my favorite was the plain linguine noodles. It reminded me of the game, Pick up Sticks. I would hold them about foot above the scanner and drop them. What we see above is the result. I took the scan into Photoshop and and added a photofilter. I also adjusted the hues and vibrancy.

1. Linguine; 2/14/2011 7:30 am; Epson Perfection V500 Photo

Saturday, February 5, 2011

Edits

Bridge; 2/3/2011 12:34 pm; f/4.9, 1/200, Flash did not fire, Canon PowerShot SD790IS
Eye; 2/5/2011 5:43 pm; f/4.9, 1/160, Flash did not fire, Canon PowerShot SD790IS
Megan; 2/5/2011 5:36 pm; f/3.2; 1/320; Flash did not fire, Canon PowerShot SD790IS
This is my adorable little sister Megan Sharp. The bridge shot was taken in Draper, Utah. I thought the color was a little bland so I did the color match in Photoshop. I used the photo, Lil' Sis in the entry below and matched it to the bridge photo and then changed, ever so lightly, some of the sliders.  On the eye shot I sharpend the eye (no pun intended) and eliminated some of the black under her eye. I followed the tutorials on Brain Honey. For the last shot I selected Megan's shirt and changes the hue of the color. 


Portraits


Candy; 2/3/2011 1:40 pm; f/3.5; 1/60; Flash did not fire; Canon PowerShot SD790IS
Tube; 2/5/2011 5:55 pm; f/4.9; 1/800; Flash did not fire; Canon PowerShot SD790IS
Workers; 2/5/2011 6:01 pm; f/4.9; 1/500; Flash did not fire; Canon PowerShot SD790IS
Sup!; 2/3/2011 1:56 pm; f/2.8; 1/60; Flash did not fire; Canon PowerShot SD790IS
Jump; 2/3/2011 12:51 pm; f/4.9; 1/500; Flash did not fire; Canon PowerShot SD790IS
Lil' Sis; 2/3/2011 12:57 pm; f/4.9; 1/500; Flash did not fire; Canon PowerShot SD790IS
Swing; 2/5/2011 5:39 pm; f/4.2; 1/500; Flash did not fire; Canon PowerShot SD790IS
Texture; 2/3/2011 12:43 pm; f/9; 1/160; Flash did not fire; Canon PowerShot SD790IS

I really enjoyed taking portraits and environment shots. I tried to be creative and show the personality of the people photographed. Candy was taken at the airport, waiting for my little brother to come home from his mission. The little girl so badly wanted candy, but mom and dad weren't giving in. In tube, right after the shot the little boy burst out in tears. He had a rough spill. I added an adjustment layer to lighten it a bit. On Jump, I did some cropping to capture the subject a little better. On Swing, I lightened the picture again with an adjustment layer and changed the mode. In the last picture I added a texture filter.